

FastAPI and MongoDB: The Best of Both Worlds
Creating a simple CRUD app with MongoDB and FastAPI, with testable endpoints via Swagger documentation.


Introduction
If you are ready to use FastAPI in your projects, why not begin with a simple CRUD app with a popular NoSQL database like MongoDB? This blog will help you make a uvicorn server with RESTful API endpoints, which will be tested using the auto-generated Swagger documentation.
If you need a background for FastAPI, please look at my previous blog here. I don't want you to clone the repository directly and begin your work with the template, rather understand the intuition behind every package used in it.
Installation
To begin this project you must have Python installed into your system. If you don't have it installed, refer here. If installed, it is recommend updating it to the latest stable version. After that, you may either choose to use MongoDB Atlas (if you don't want to install another software into your PC) or a local version of MongoDB. We will look into the details of MongoDB as we proceed.
Jump into your Code Editor
Create a new folder for your project (I named it fastapi-crud-app) and open the folder in your code editor. I'll be using VSCode for writing code here, although PyCharm and other editors are good to go. The operating system I'll be using is Ubuntu 22.04.4 LTS. We will proceed with the project step by step, although some commands regarding virtual environments may vary.
Virtual Environment
Think of it as a container that separates the packages used for this project from the other installed packages in your system. This becomes crucial for large projects where the version management of individual packages is important. Nonetheless, we will be using a virtual environment to begin using FastAPI.
Open the terminal and type the following command:
python3 -m venv .venv
This creates a folder (a virtual environment) named .venv at the location. Let us look at the structure of the .vevn folder.
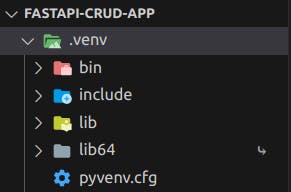
The bin folder contains the essential scripts for the project, while the lib folder contains the packages that will be installed. To begin installing other packages we need to activate the virtual environment.
cd .venv/bin
source activate
Upon executing this command, you will see the activated environment at the beginning of your terminal newline. (In my case, it occurs as (.venv) in white)

This means you have correctly activated the virtual environment.
Installing dependencies
After the virtual environment is activated, you are ready to install packages. Python has pip package installer to install the packages (just as npm in NodeJS). Just type in pip install <package_name> to install any package. For this project we need FastAPI.
pip install fastapi
This installs fastapi package for you. You can type pip list and view the installed packages. Similarly, install uvicorn to run the server via the command pip install uvicorn . To see the list of all the dependencies used in the project, we generally list them down in a requirements.txt file. To do so, move to the parent directory and type:
pip freeze > requirements.txt
This command creates a file named requirements.txt which lists all the currently installed dependencies. The user must note and appreciate that, by only having the requirements.txt file, one can replicate the entire environment and similarly, have multiple different environments for a single project. If you know version control (git), you don't upload all the packages to the repository. Rather you add the requirements.txt file and can later install all the packages in it via the command:
pip install -r requirements.txt
Creating a server
Now, let us dig into writing some code. In the root directory, create a new file called main.py or server.py as you wish and write the following code into it.
from fastapi import FastAPI
from contextlib import asynccontextmanager

@asynccontextmanager
async def lifespan(app: FastAPI):
    print("startup has begun!!")
    yield
    print("shutdown has begun!!")

app = FastAPI(lifespan=lifespan)
Type the following code into your terminal to run the uvicorn server:
uvicorn server:app --reload --port 8000
To terminate the server just press Ctrl + C. You must be able to see the following in your terminal.
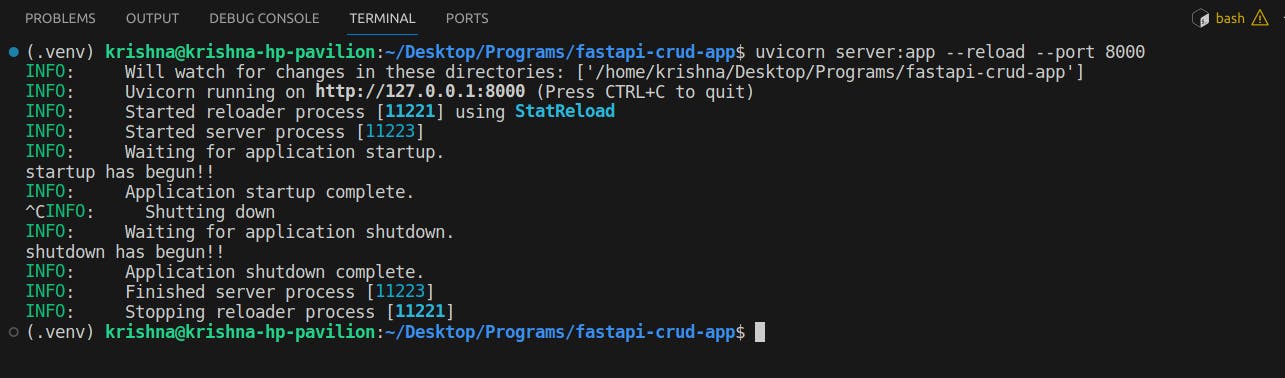
So far so good. Now let us understand the code. Firstly, we import FastAPI from the package fastapi (which was installed earlier). We run an instance of this FastAPI called as app. Then we import asynccontextmanager from contextlib. These are used to define async contexts in fastapi. To know what async is, you may refer to this wonderful explanation.
The function lifespan is of async type and so is decorated with an asynccontextmanager. Whatever we write after the function declaration and before the yield call are all executed before startup. All lines after yield will execute before shutdown. Here, we printed the statements, but later, we may need to establish a connection with our database and terminate it accordingly. We later create a FastAPI instance named as app , which is passed the lifespan parameter as lifespan function.
The command uvicorn server:app --reload --port 8000 specifies uvicorn to run the app instance present in the server.py file and reload the server whenever there are changes in the files. The port number can be specified. (By default, it runs over the port 8000)
Connecting with the database
With our basic server listening over port 8000, let us establish a connection with our MongoDB database. For that, we need a connection string. If you are using MongoDB atlas, you can find the connection string via these steps. If you are using a local version of the database instance running, your connection string would be something like mongodb://localhost:27017/ or you can find it in the MongoDB Compass. With the connection string grabbed, let us connect with the database. For this, we need the package pymongo. Just type pip install pymongo to install it in your environment. Now add the following lines of code to your server.py file:
from pymongo import MongoClient

async def connectToDatabase():
    db = MongoClient("<YOUR_ACTUAL_CONNECTION_STRING>")
    print(db);
    return db

@asynccontextmanager
async def lifespan(app: FastAPI):
    print("startup has begun!!")
    dbHost = await connectToDatabase()
    app.players = dbHost.tournament.players
    yield
    print("shutdown has begun!!")
We create a function named connectToDatabase to make a connection to the database. We import MongoClient and pass it the connection string to get the database instance. And later call it over server startup event. We pass the database instance to the app object.
The environment variables
As we have seen while connecting to the database, we pass a connection string to the MongoClient to establish a secure connection. However, this connection string is highly sensitive and cannot be hard-coded into the repository. Hence, we embed these sensitive variables into the server environment. To do this effectively, install python-dotenv via pip install python-dotenv. On installing, we create a new file credentials.env in our source folder and populate it with:
MONGO_CONNECTION_STRING = "<YOUR_ACTUAL_CONNECTION_STRING>"
Then modify our server.py file (connectToDatabase function) as follows
from dotenv import dotenv_values

config = dotenv_values("credentials.env")

async def connectToDatabase():
    db = MongoClient(config["MONGO_CONNECTION_STRING"])
    print(db)
    return db
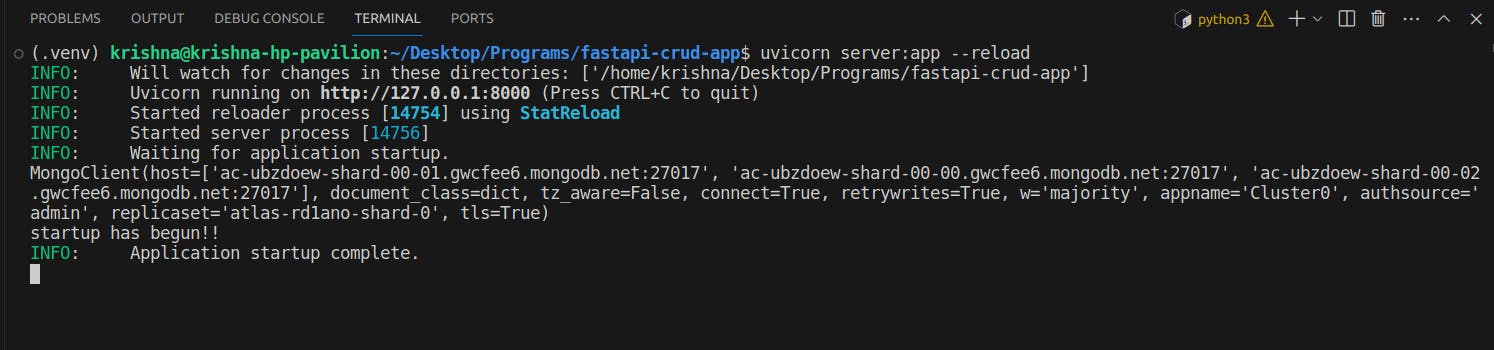
If everything goes correctly, you can see a MongoClient connection string printed in the terminal.
Creating an API endpoint
If our app is small and has only one or a few endpoints to it, we may use server.py to add those route logic to it. However, best practice is to create and use a router via APIRouter. Let us create a new file routes.py in the parent directory.
from fastapi import APIRouter, Request

router = APIRouter(prefix="", tags=['players'])

@router.get("/")
async def getPlayers(request: Request)
    print(request.app.db)
    return {"message": "Hello World!!"}
This routes.py file needs to be connected to server.py to transfer the execution flow to it. We do it by app.include_router(router) . Adding these lines of code into the server.py makes it finally look like:
from fastapi import FastAPI
from contextlib import asynccontextmanager
from pymongo import MongoClient
from dotenv import dotenv_values
from routes import router

config = dotenv_values("credentials.env")

async def connectToDatabase():
    db = MongoClient(config["MONGO_CONNECTION_STRING"])
    print(db)
    return db

@asynccontextmanager
async def lifespan(app: FastAPI):
    dbHost = await connectToDatabase()
    app.players = dbHost.tournament.players
    print("startup has begun!!")
    yield
    print("shutdown has begun!!")

app = FastAPI(lifespan=lifespan)
app.include_router(router)
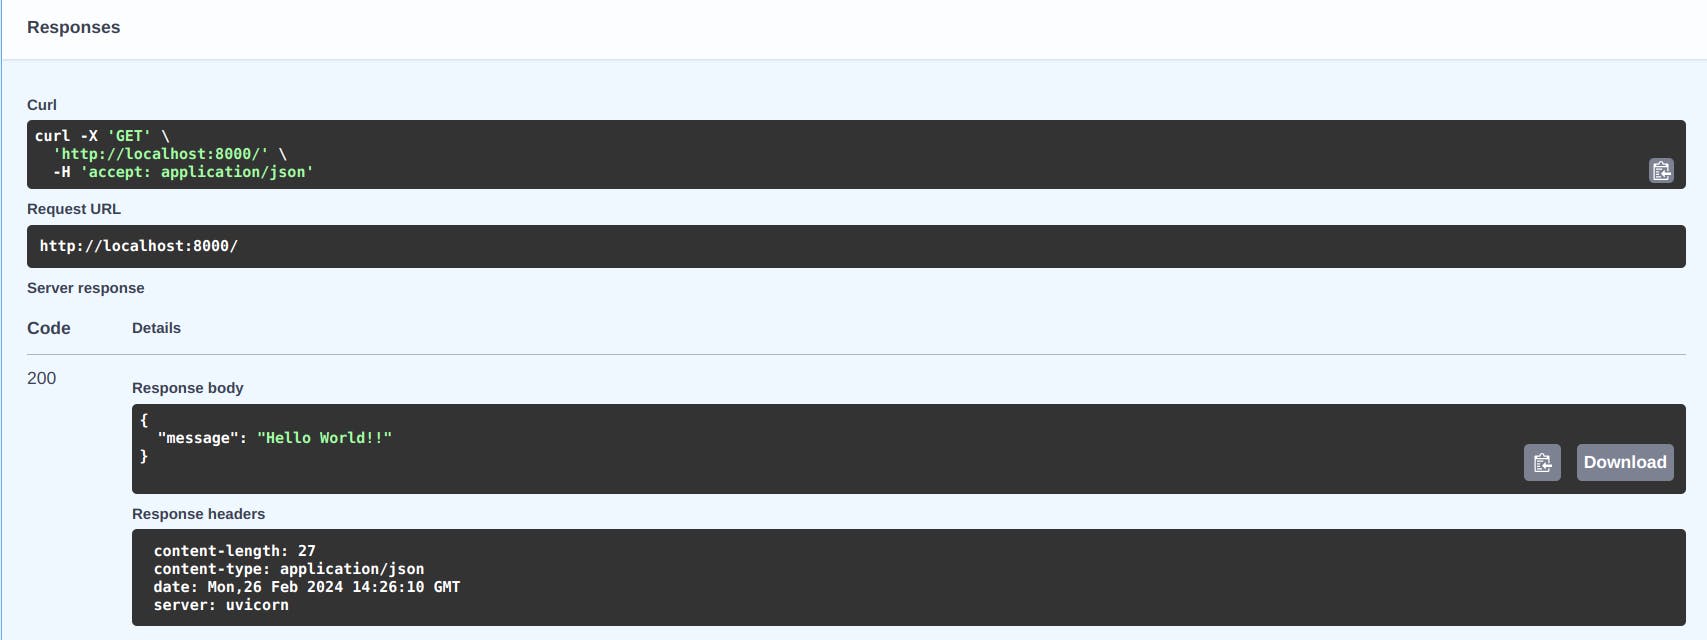
Now run the command uvicorn server:app --reload and check the URL localhost:8000/docs to view the latest endpoint we made. On clicking the execute button, if you see something like this, Kudos!! Your server is up and ready.
Things to note:
In
routes.pythe APIRouter has a field prefix, meaning all the requests are assumed to have the string as a prefix. For example, if we provide the prefix tournament, the API endpoints will have the prefix"http://localhost:8000/tournament/".In
routes.pythe function getPlayers accepts a request object which is a datatype of Request. Here comes the magic of Pydantic data validation into play. It automatically checks if the request object received matches with the correct datatype.The database collection
db.tournament.playersis received asrequest.app.players, as we have set inserver.pyfile. (Although this method is not recommended. One should useDependecyfor it)
Models
Since we know a nudge about how Pydantic works, it is beneficial to declare models beforehand for Pydantic to verify them and create no headaches for us ahead.
Create a directory models into the parent directory, and create a new file playerModels.py into it.
from pydantic import BaseModel, Field
from typing import Optional

class Player(BaseModel):
    id: Optional[str] = Field(default_factory=str, alias="_id")
    name: str
    age: int = Field(gt=0)
    role: str
    team: str
    additional_details: str | None = None
This code is pretty self-explanatory. We define a class Player which is an extension of the Pydantic BaseModel. It includes fields explicitly mentioned as strings(str), integers(int) or optional fields that can be None.
Things to note:
id: Field(default_factory=str, alias="_id"): Default factory means we don't need to provide this field (here, id). It would be taken care of automatically.alias="_id"means this field can also have an alias as id. This is needed because MongoDB uses_idas the key for theidfield.age: Field(gt=0): This makes sure that the value we provide as age must be an integer with a value greater than 0. These are essential for explicit data validations.
CRUD Operations
We have our Pydantic model ready to receive requests and validate it accordingly. Now, finally our routes.js will look like this:
from fastapi import APIRouter, Request, Body
from models.playerModels import Player
from bson import ObjectId

router = APIRouter(prefix="", tags=['Players'])

@router.get("/")
async def getPlayers(request: Request)->list[Player]:
    db = request.app.players
    response = list(db.find({}))
    for item in response:
        item["_id"] = str(item["_id"])
    return response

@router.post("/")
async def addPlayer(request: Request, player: Player = Body(...)):
    db = request.app.players
    response = db.insert_one(player.model_dump())
    return {"id": str(response.inserted_id)}

@router.delete("/{id}")
async def deletePlayer(request: Request, id):
    _id = ObjectId(id)
    db = request.app.players
    response = db.delete_one({"_id": _id})
    return {"deleted_count": response.deleted_count}

@router.put("/{id}")
async def updatePlayer(request: Request, id, player: Player = Body(...)):
    _id = ObjectId(id)
    db = request.app.players
    response = db.update_one({"_id": _id}, {"$set": player.model_dump()})
    return {"updated_count": response.modified_count}
Things to note:
READ / GET request: We explicitly mention the return type of the
getPlayersvia->after the function declaration. Here we return the list of objects ofPlayerclass. As we have mentioned inplayerModels.pythe data type of the field_idoridis a string, we have to convert the BSON object into a string.CREATE / POST request: The data that needs to be added is inside the request body. We can automatically validate the data format using Pydantic, received from the Body. Now since the player object is the
Playerclass, we convert it into a JSON object using themodel_dump()method.DELETE / DELETE request: The ID of the object to be deleted is passed as a path parameter. Now this id is in string format, which needs to be converted into BSON format again, using the
ObjectIdfunction frombson.UPDATE / POST request: Everything in this is similar to other requests.
Hey! We just successfully created a CRUD app! You can test the endpoints using the Swagger docs at localhost:8000/docs.
Conclusion
This is a step-by-step guide for creating a MongoDB and FastAPI CRUD app. However, the methods used in this guide may not be entirely conventional and could change with future upgrades to FastAPI. For more information, please refer to the official FastAPI documentation. You can find the repository link for this project at: https://github.com/Krishna-D-K/FastAPI_Mongo. Follow the DevHub community blog on Hashnode for more interesting and valuable tech articles. Join our Discord community for free resources, tech insights, and internship/job opportunities!